
Restoring old tile floors involves a multi-step process to revive their aesthetic appeal and extend their lifespan. Preparation starts with vacuuming or sweeping, followed by a soapy solution for cleaning. Removing old sealers and finishes with chemicals or steam cleaners prepares the tiles and grout for repair. Repairing chipped or missing tiles ensures a seamless finish. Regrouting enhances appearance and involves matching new grout to the original color and applying it with a float. Strategic cleaning considers tile material and uses pH-neutral cleaners for delicate stones, while regular sealing and maintenance preserve the restored floors' beauty.
Reviving old tile floors can transform your space, breathing new life into a classic feature. This guide delves into the process of restoring worn-out tiles and grout, focusing on understanding damage, preparation, and practical steps. From cleaning and repairing chips to re-grouting accurately, you’ll learn how to achieve professional results. We also provide insights on choosing suitable cleaners, protecting your floors, and maintaining them long-term. Discover the art of rejuvenation and learn how to restore old tile and grout effectively.
Understanding Old Tile and Grout Damage
Old tile floors hold a charm that’s hard to resist, but over time, they can show signs of damage. Understanding what causes these issues is key when it comes to learning how to restore old tile and grout. Wear and tear from foot traffic, especially in high-traffic areas like kitchens or entryways, can lead to chipped tiles and discolored grout. Moisture intrusion, another common problem, can cause grout to soften and expand, resulting in gaps and an uneven surface. Additionally, hard water stains and mineral buildup can leave unsightly marks on the tile’s surface.
These issues aren’t just cosmetic; they can also indicate deeper structural problems that, if left unaddressed, could compromise the floor’s integrity. That’s why a thorough cleaning and repair process is essential. By addressing these damage types head-on, you’ll not only revive the appearance of your old tile floors but also extend their lifespan, ensuring they remain a beautiful and functional part of your home for years to come.
Preparation: Cleaning and Removing Old Sealers

Before tackling any restoration project, thorough preparation is key. When it comes to reviving old tile floors, the first step involves cleaning and removing any existing sealers or coatings. This process ensures that your tiles are in their most pristine state for the restorative work ahead. Start by vacuuming or sweeping to remove any loose dirt and debris. Then, use a mild detergent and warm water to create a soapy solution. Employ a floor scrubber or brush to gently clean the tiles, focusing on any stained or discolored areas.
Once cleaning is complete, it’s time to strip away old sealers and finishes. This can be achieved using specialized chemical strippers or a steam cleaner. These tools will help lift away the aging sealer, revealing the raw tile and grout below. Be sure to follow safety precautions when handling chemicals and wear protective gear, including gloves and goggles, as some products may emit strong fumes.
Repairing Chipped or Missing Tiles
Repairing chipped or missing tiles is a crucial step in restoring old tile and grout. Start by gathering replacement tiles that match the original color and texture. Carefully remove any loose debris from the damaged area, using a vacuum or soft brush to ensure a clean surface. Next, mix a small amount of grout with water, following the manufacturer’s instructions for consistency. Using a grout spatula, apply the fresh grout into the gaps left by missing or chipped tiles. Press firmly to create an even surface and allow it to set according to the product’s drying time. Once dry, inspect the repaired area, making any necessary touch-ups to ensure a seamless finish.
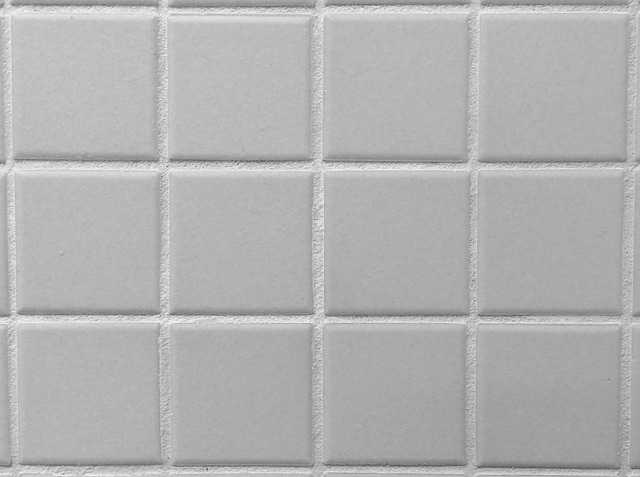
Re-grouting: A Step-by-Step Guide

Reviving old tile floors involves several steps, with one of the most effective being re-grouting. Here’s a step-by-step guide on how to restore old tile and grout effectively. Begin by removing any loose debris or dirt from the floor using a vacuum or brush. Next, prepare a mixture of new grout according to the manufacturer’s instructions, ensuring it matches the original colour if possible. Using a grout float, apply the fresh grout into the gaps between tiles, pressing firmly to create a smooth surface. Remove excess grout with a rubber grouting tool, wiping away any residue from the tile surfaces.
Allow the grout to set completely according to the packaging directions. Once cured, thoroughly clean the floor with warm water and a mild detergent to remove any residual dirt or marking left by the re-grouting process. After cleaning, dry the floor using a microfiber towel for a shiny, restored finish that highlights the beauty of your old tile floors.
Choosing the Right Cleaning Solutions

When it comes to reviving old tile floors, choosing the right cleaning solutions is a crucial step in the restoration process. The first consideration is understanding the type of tiles and grout you have. Different materials require specific care; for instance, natural stone tiles may need pH-neutral cleaners to avoid damage. Once identified, select a gentle yet effective cleaner that can loosen dirt and grime without stripping away the tile’s finish or damaging the grout lines.
For how to restore old tile and grout, consider using specialized products designed for deep cleaning. These solutions often include enzymes that effectively break down organic stains and bacteria. Additionally, ensure you have the right tools, such as a soft-bristled brush and a vacuum with an attachment for tight spaces, to thoroughly clean the tiles and reach into every crevice. This meticulous approach will help in achieving a sparkling finish, bringing your old tile floors back to life.
Protecting Your Restored Floors

After successfully restoring your old tile floors, protecting them is the next crucial step in maintaining their beauty and longevity. The process of how to restore old tile and grout involves removing years of dirt and damage, so it’s essential to create a barrier against future wear and tear.
Regular sealing is key; use a high-quality sealer designed for ceramic and porcelain tiles to protect against moisture, stains, and general traffic. Additionally, keep a close eye on the grout lines, as these can quickly become dirty and damaged. Regular cleaning with a mild detergent and a soft brush will help maintain their appearance, ensuring your restored floors stay vibrant and in top condition for years to come.
Tips for Long-Term Maintenance
To keep your restored old tile floors looking their best over the long term, regular cleaning and maintenance are key. Start by sweeping or vacuuming regularly to remove loose dirt and debris. Avoid using harsh chemicals or abrasive cleaners, as these can damage the tiles and grout. Instead, opt for a mild detergent and warm water solution, and test any cleaner in an inconspicuous area first to ensure compatibility.
Deep cleaning every few months is also essential. This includes scrubbing the grout lines with a soft-bristled brush and a suitable grout cleaner to remove any built-up grime. Reapplicating sealant once a year can add extra protection against stains and moisture, keeping your floors looking fresh and vibrant. Regular maintenance will ensure that your How to Restore Old Tile and Grout project lasts for years to come, preserving the beauty of your historic flooring.