
Restoring old tile and grout in high-traffic areas involves several steps:
1. Assess Damage: Inspect tiles for cracks, chips, or discolouration and grout lines for gaps or mold growth.
2. Prepare Surface: Vacuum/sweep, use a floor scrubber, and remove loose debris and stains. For severe cases, apply mild acid and thoroughly rinse.
3. Repair and Replace: Remove old grout, clean gaps, and re-grout evenly. Repair missing tiles closely matching existing ones.
4. Clean Thoroughly: Sweep, vacuum, and rinse with a damp mop to remove cleaning solutions.
5. Select Materials: Choose durable, water-resistant grout that matches the existing color. Use proper application techniques with a gum or rubber trowel.
6. Seal Properly: Apply a water-repellent sealer following manufacturer instructions for protection against moisture and stains.
7. Maintain Regularly: Gently clean regularly, avoid harsh chemicals, monitor for damage, and reapply sealer as needed.
Avoid DIY mistakes by understanding the process, using proper tools and materials, and thoroughly cleaning before restoration.
“Discover the secrets to revitalizing your high-traffic areas with our comprehensive guide to tile surface restoration. Explore the challenges posed by constant footfall and learn how to assess and prepare old tiles and grout for a transformative makeover. From cleaning techniques and repair strategies to choosing the perfect regrouting materials, we’ll walk you through every step of the process. Say goodbye to dull, worn-out tiles and embrace the beauty of restored floors with our expert tips and insights on ‘How to Restore Old Tile and Grout’.”
Understanding the Wear and Tear of High-Traffic Areas
In high-traffic areas, tiles often face relentless wear and tear from constant footfall, furniture movement, and exposure to moisture. Over time, this can lead to significant damage, including chipped edges, cracked grout lines, and discolored surfaces. Understanding the specific challenges faced in these areas is key to effective restoration. Regular cleaning may initially hide these issues, but proper restoration techniques are necessary to bring back the original look and durability of the tiles and grout.
Knowing how to restore old tile and grout involves assessing the extent of damage, preparing the surface, and selecting suitable materials. This process often requires removing loose debris, patching holes or cracks, regrouting, and re-sealing to ensure water resistance. By addressing these issues proactively, property owners can extend the lifespan of their tiles, maintain a safe and aesthetically pleasing environment, and avoid more costly repairs in the future.
Assessing the Condition of Old Tile and Grout

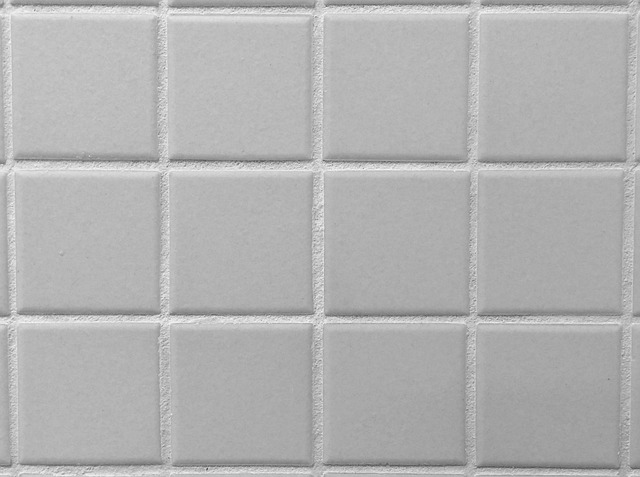
Assessing the condition of old tile and grout is a crucial step in any restoration project, especially for high-traffic areas. Start by inspecting the tiles for any signs of damage, such as cracks, chips, or delamination. Look closely at the grout lines, noting any gaps, discolouration, or mold growth. These issues often indicate wear and tear or water damage that requires addressing before proceeding with restoration.
To accurately determine the extent of the work needed, consider employing non-invasive methods like moisture meters to check for underlying damage or humidity levels. How to restore old tile and grout involves a combination of cleaning, repairing, and replacing as necessary. This process ensures that not only does the surface look new again, but it’s also structurally sound to withstand heavy foot traffic.
Preparing the Surface: Cleaning and Repairing
Preparing the surface is a crucial step in tile surface restoration, especially for high-traffic areas. The first task is to thoroughly clean the tiles and grout using a combination of mechanical and chemical methods. Start by vacuuming or sweeping away any loose debris, dirt, or grime. Then, use a floor scrubber or brush to agitate the surface, removing stubborn stains and buildup. For more severe cases, a mild acid solution can be applied to dissolve mineral deposits and deep-set grime, followed by a rinse to ensure no residue remains.
Once the surface is clean, any damaged or missing tiles and grout need to be repaired. This involves replacing worn-out pieces and re-grouting as needed. Use a drill with a brick or tile bit to remove the old grout, taking care not to damage the surrounding tiles. Clean out the gaps thoroughly before applying new grout, ensuring it fills the spaces evenly. For missing tiles, consider matching the existing ones as closely as possible to maintain the aesthetic integrity of the area.
Removing Old Sealers and Grout

Restoring old tile and grout in high-traffic areas begins with removing the existing sealer and grout. This process is crucial for achieving a fresh, clean look and ensuring proper adhesion of new materials. Start by sweeping the floor to remove any loose debris or dirt. Then, use a floor scrubber or a stiff brush to agitate the old sealer and grout. For tough, encrusted residue, apply a commercial grout remover and let it sit according to the manufacturer’s instructions before scrubbing again.
Once the old sealer and grout are broken down, vacuum thoroughly to remove all remnants. Pay close attention to corners, edges, and gaps where debris can easily be trapped. After vacuuming, use a damp mop or sponge to rinse the floor, ensuring that all cleaning solutions and loose particles are removed. This meticulous process is essential for preparing the tile surface before applying new sealers or grout, guaranteeing a long-lasting, visually appealing finish.
Re-grouting: Choosing the Right Materials

When restoring old tile and grout in high-traffic areas, re-grouting is a crucial step. The first consideration is choosing the right materials. Opt for durable, water-resistant grout that matches the existing color for a seamless look. Ensure it’s suitable for heavy foot traffic to prevent stains and easy cleaning. Additionally, select a re-grouting product designed for high-wear areas, offering long-lasting protection.
Proper application is key. Use a gum or rubber trowel to apply the grout, filling the spaces between tiles evenly. This ensures even wear over time. Allow it to set thoroughly, following manufacturer instructions, before sealing with a water-repellent sealer for added protection against moisture and stains.
Restoring and Protecting the Tile Surface

Restoring and protecting a tile surface in high-traffic areas involves more than just cleaning; it’s about bringing back its former glory while ensuring longevity. The first step is to thoroughly inspect the tiles and grout, identifying any damaged or discolored areas. This could include chips, cracks, or stained grout lines. How to restore old tile and grout involves a careful process of repair and regeneration.
Start by removing any loose debris or dirt using a vacuum or brush. Then, use suitable cleaning solutions to remove stains from the grout and tiles. Once clean, repair damaged areas with appropriate tile repair compounds. For grout, a deep cleaning with a grout cleaner will ensure any existing stains are eliminated. After grouting, seal the surface with a water-resistant sealer to protect against future staining and moisture damage.
Tips for Maintaining Restored Tile Floors

After successfully restoring your tile floors, maintaining their beauty and longevity requires a few simple tips. Regular cleaning is key; use a gentle cleaner suitable for tiles and grout to remove dirt and grime without damaging the new finish. Avoid harsh chemicals which can erode the restored surface. Additionally, keep an eye out for any signs of damage or discolouration and address them promptly. This could mean re-grouting problematic areas or applying a fresh coat of sealer to protect against future stains. Remember, regular maintenance will ensure your How to Restore Old Tile and Grout remains in top condition for years to come.
Common Mistakes to Avoid During Restoration

When undertaking tile surface restoration for high-traffic areas, avoiding common mistakes is crucial to ensure a long-lasting, visually appealing result. One frequent blunder is attempting DIY repairs without proper knowledge and tools, which can lead to uneven grout lines or poorly restored tiles. It’s essential to invest time in understanding the process of how to restore old tile and grout, including gathering the right materials and equipment. Using subpar products or cutting corners on preparation will result in a patchy repair that won’t withstand heavy footfall.
Another mistake to steer clear of is neglecting thorough cleaning before restoration. Dusty or greasy surfaces can hinder adhesion, causing future issues with durability. Always take the time to thoroughly clean the tiles and grout, removing any dirt, stains, or debris. This ensures a fresh start for your restoration project, allowing for optimal bonding between the repair materials and the existing surface.
Before and After: The Transformation of Old Tiles

Before beginning any restoration project, it’s essential to understand the “before” state of your tile surface. Over time, tiles in high-traffic areas can show significant wear and tear, with grout lines becoming stained and uneven. This can make the entire space appear dated and uninviting. However, with the right approach, these old tiles can be restored to their former glory, creating a fresh and vibrant look.
The “after” transformation is where the magic happens. Through meticulous cleaning, repairing damaged areas, and re-grouting, old tiles can be revitalized. This process involves removing old grout, deep cleaning the tile surfaces, fixing cracks or chips, and refilling grout lines. The result is a sleek, uniform appearance that enhances the overall aesthetics of the area. By learning how to restore old tile and grout effectively, you can extend the life of your flooring and create an inviting, updated space.